Regular garage door maintenance can prevent costly repairs and extend your door’s lifespan significantly. This guide covers seven essential strategies for keeping your garage door—which operates over a thousand times yearly—running smoothly, safely, and quietly, regardless of whether you have a steel, wooden, or insulated model.
Your garage door is one of the largest moving parts in your home, cycling up and down over a thousand times each year. Yet many homeowners overlook this hardworking piece of equipment until something goes wrong, and by then, a simple maintenance task has often become an expensive repair. The good news? Most garage door problems are entirely preventable with regular attention.
Whether you have a traditional steel door, a wooden carriage-style design, or a modern insulated model, these seven maintenance strategies will help you keep your garage door running smoothly, safely, and quietly for years to come. Let’s walk through each approach so you can create a simple maintenance routine that fits your schedule and protects your investment.
1. Master the Monthly Visual Inspection Routine
The Challenge It Solves
Most garage door failures don’t happen overnight. Small issues like frayed cables, loose hardware, or worn rollers gradually worsen until they cause a complete breakdown. By the time you notice a problem, what could have been a simple fix has often turned into a major repair. A monthly visual inspection catches these warning signs early, when they’re easiest and least expensive to address.
The Strategy Explained
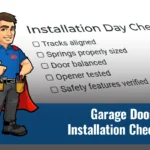
Set aside 15 minutes once a month to give your garage door a thorough visual examination. With the door closed, look for gaps along the sides and bottom that might indicate misalignment or worn weatherstripping. Check all visible hardware for rust, looseness, or signs of wear. Then open the door halfway and release it. If it doesn’t stay in place, your door is out of balance and needs professional adjustment.
Pay special attention to the cables that run along both sides of the door. These steel cables are under tremendous tension and should never have broken strands or fraying. Also inspect the rollers for cracks or excessive wear, especially if they’re made of plastic rather than steel.
Implementation Steps
1. Close the door completely and walk around it, checking for gaps, dents, or damage to panels and weatherstripping.
2. Open the door and inspect cables for fraying, rollers for wear, and all visible bolts and brackets for tightness.
3. Test the door balance by opening it halfway and releasing it to see if it stays in position without drifting up or down.
4. Listen carefully during operation for new sounds like grinding, scraping, or squeaking that might indicate developing problems.
Pro Tips
Take photos during your first inspection so you have a baseline for comparison. Keep a simple log on your phone noting the date and any observations. This creates a maintenance history that helps you spot gradual changes and proves valuable if you ever need warranty service or want to show a repair technician what’s changed. Homeowners in Troy seeking garage door maintenance services often benefit from keeping detailed records.
2. Keep Moving Parts Properly Lubricated
The Challenge It Solves
Every time your garage door opens or closes, dozens of metal components rub against each other. Without proper lubrication, this friction creates wear, generates heat, and produces that annoying squeaking sound that echoes through your home. Over time, dry components wear out faster, requiring premature replacement. Regular lubrication reduces friction dramatically and keeps everything operating smoothly and quietly.
The Strategy Explained
The right lubricant makes all the difference. Many homeowners reach for WD-40, but this is actually a solvent rather than a long-term lubricant. Instead, use white lithium grease or a silicone-based spray specifically designed for garage doors. These products stay in place, resist temperature extremes, and won’t attract dust and debris like oil-based alternatives.
Focus your lubrication efforts on the hinges, rollers, springs, and any bearing plates. A light coating is all you need. Too much lubricant attracts dirt and creates a gummy buildup that actually increases friction over time. Think of it like moisturizing your skin—a thin, even layer works better than drowning everything in product.
Implementation Steps
1. Wipe down all moving parts with a clean cloth to remove old lubricant, dirt, and debris before applying fresh lubricant.
2. Apply white lithium grease or silicone spray to each hinge, focusing on the pivot points where metal meets metal.
3. Spray lubricant on the roller bearings and along the torsion spring above the door, coating it lightly but completely.
4. Operate the door several times to work the lubricant into all the moving parts, then wipe away any excess that drips.
Pro Tips
Schedule lubrication twice a year, ideally in spring and fall when temperature changes put extra stress on components. If you live in a coastal area with salt air or in a region with extreme temperature swings, consider lubricating quarterly. Always lubricate after washing your car in the garage, as water spray can wash away protective coatings.
3. Test and Maintain Safety Features Regularly
The Challenge It Solves
A garage door weighs several hundred pounds and operates under significant spring tension. If safety features fail, the results can be devastating. Children, pets, and adults have all been seriously injured by garage doors with malfunctioning auto-reverse systems. The U.S. Consumer Product Safety Commission recommends monthly testing of these features because they’re your primary protection against tragedy.
The Strategy Explained
Modern garage doors have two essential safety mechanisms. The auto-reverse feature uses force sensors that detect resistance when the door contacts an object. The photo-eye system uses infrared beams mounted near the floor to detect anything in the door’s path. Both systems should stop and reverse the door immediately when triggered.
Testing takes less than two minutes but could prevent a lifetime of regret. Place a solid object like a roll of paper towels in the door’s path and try to close it. The door should reverse immediately when it touches the object or breaks the photo-eye beam. If it doesn’t, your safety system needs immediate professional attention.
Implementation Steps
1. Test the auto-reverse by placing a sturdy object like a cardboard box on the ground where the door will contact it.
2. Close the door using your wall button or remote, watching carefully as it descends toward the object.
3. Verify that the door immediately reverses direction when it touches the object without applying significant downward pressure.
4. Test the photo-eye sensors by waving your hand through the beam while the door is closing to confirm it reverses instantly.
Pro Tips
Clean the photo-eye lenses monthly with a soft cloth. These sensors are typically mounted about six inches above the floor, right where they collect dust, cobwebs, and garage grime. Even a thin film can interfere with the infrared beam. Residents throughout Sterling Heights rely on professional maintenance to ensure their safety systems function properly year-round.
4. Balance Your Door for Optimal Performance
The Challenge It Solves
An unbalanced garage door forces your opener motor to work harder with every cycle. This extra strain shortens the motor’s lifespan and can lead to premature failure of your opener system. More importantly, an unbalanced door is a safety hazard. If the door is too heavy on one side or the springs have lost tension, the door could come crashing down unexpectedly.
The Strategy Explained
Your garage door should be balanced so precisely that you can lift it manually with minimal effort. The torsion springs above the door do most of the heavy lifting, counterbalancing the door’s weight so your opener motor only guides the movement rather than supporting the full load. When springs wear out or lose tension, this balance shifts.
Testing balance is straightforward but revealing. Disconnect your opener by pulling the emergency release handle, then manually lift the door about halfway. Let go carefully. A properly balanced door will stay roughly in position. If it drops quickly, the springs have lost tension. If it rises on its own, the springs are too tight. Either condition requires professional adjustment.
Implementation Steps
1. Close the door completely and pull the emergency release cord to disconnect the opener from the door.
2. Manually lift the door to waist height, moving slowly and listening for grinding or resistance that might indicate track problems.
3. Release the door gently and observe whether it stays in place, rises, or falls on its own.
4. If the door doesn’t hold position, contact a professional technician to adjust or replace the springs.
Pro Tips
Never attempt to adjust torsion springs yourself. These components are under extreme tension and require specialized tools and training to service safely. Serious injuries occur every year when homeowners try DIY spring repairs. This is one maintenance task that absolutely requires professional expertise. Test balance quarterly to catch spring wear before it becomes dangerous.
5. Protect and Maintain Your Weatherstripping
The Challenge It Solves
The rubber seal along the bottom of your garage door and around its perimeter creates a barrier against weather, pests, and energy loss. When this weatherstripping cracks, hardens, or pulls away, you’re essentially leaving a gap in your home’s envelope. Cold air rushes in during winter, hot air infiltrates in summer, and insects find an easy entry point. Damaged weatherstripping also allows moisture to seep in, potentially damaging stored items and promoting mold growth.
The Strategy Explained
Weatherstripping faces constant abuse from temperature extremes, UV exposure, and physical contact with your concrete floor. The bottom seal takes the worst beating, compressing thousands of times each year while exposed to rain, snow, and road salt tracked in by your vehicles. Inspecting this seal seasonally helps you catch problems before they compromise your garage’s protection.
Quality weatherstripping should be flexible, form a complete seal when the door is closed, and show no signs of cracking or brittleness. If you can see daylight under your closed door or feel air movement along the edges, your weatherstripping needs attention. Replacement is usually a straightforward weekend project that dramatically improves your garage’s comfort and efficiency.
Implementation Steps
1. Close the door and turn off the garage lights, then look for light leaking under or around the door edges.
2. Run your hand along the bottom seal and side weatherstripping, checking for cracks, hardness, or sections that have pulled away.
3. Clean the existing weatherstripping with mild soap and water, removing dirt and debris that can accelerate wear.
4. Apply a rubber conditioner or silicone spray to keep the material flexible and resistant to cracking.
Pro Tips
Replace weatherstripping before winter arrives. Cold temperatures make brittle seals even worse, and you’ll appreciate the improved insulation during heating season. When buying replacement weatherstripping, bring a sample of your current seal to ensure you get the correct profile. Homeowners in West Bloomfield prioritize garage door maintenance before the harsh Michigan winters set in.
6. Clean and Align Your Tracks
The Challenge It Solves
Your garage door travels along metal tracks mounted on both sides of the opening. When these tracks accumulate dirt, grease, or debris, the rollers can’t move smoothly. Even worse, if the tracks become misaligned—often from accidental impact or loose mounting brackets—the door binds, creating uneven wear and putting dangerous stress on cables and springs. This binding can eventually cause complete system failure.
The Strategy Explained
Think of your garage door tracks like railroad rails. They need to be clean, properly aligned, and securely mounted to guide the door smoothly through its full range of motion. A track that’s even slightly out of alignment creates resistance, forcing your opener to work harder and wearing components unevenly.
Cleaning tracks is simple but often overlooked. Dust, cobwebs, and grime build up gradually, especially in the horizontal sections where the door rests when open. A clean track ensures rollers move freely without resistance. Checking alignment requires a level and careful observation, looking for gaps between the roller and track or sections where the door seems to stick or hesitate.
Implementation Steps
1. Use a damp cloth to wipe down the inside of both tracks, removing accumulated dirt, grease, and debris.
2. Check that all track mounting brackets are securely fastened to the wall and ceiling framing.
3. Use a level to verify the tracks are plumb vertically and properly aligned with each other horizontally.
4. Watch the door operate slowly, looking for any points where rollers seem to bind or jump rather than rolling smoothly.
Pro Tips
Never lubricate the tracks themselves. While it might seem logical, lubricant on the track surface actually attracts dirt and creates a sticky buildup that interferes with roller movement. Instead, keep tracks clean and dry while lubricating only the rollers that travel within them. If you notice significant misalignment or the tracks are bent, call a professional rather than attempting adjustments yourself. Many Southfield homeowners schedule regular maintenance to prevent track-related issues.
7. Schedule Professional Tune-Ups Annually
The Challenge It Solves
Some garage door maintenance tasks require specialized knowledge, tools, and safety equipment that most homeowners don’t possess. Springs operate under hundreds of pounds of tension. Cables can snap if improperly handled. Opener adjustments involve electrical components and precise calibration. Attempting these repairs yourself risks serious injury and can void your warranty. Professional technicians have the training and equipment to service these critical components safely.
The Strategy Explained
An annual professional tune-up is like taking your car in for regular service. The technician will inspect components you can’t safely access, test systems with specialized equipment, and catch developing problems before they cause breakdowns. Most garage door manufacturers actually require annual professional maintenance to keep warranties valid, yet many homeowners skip this crucial step.
During a professional service call, technicians check spring tension and cycle counts, inspect cables for wear, test opener force settings, verify all safety features, and adjust components for optimal performance. They can also spot issues that aren’t obvious to untrained eyes, like subtle cable wear or mounting bracket stress that could lead to future failures.
Implementation Steps
1. Schedule your annual tune-up during a slower season, typically late fall or early spring when technicians have more availability.
2. Prepare a list of any unusual sounds, behaviors, or concerns you’ve noticed since the last service visit.
3. Ask the technician to show you any worn components and explain their recommendations rather than just accepting repairs blindly.
4. Keep all service records in a dedicated file or folder, creating a maintenance history for your door system.
Pro Tips
Don’t wait for problems to develop before calling a professional. Preventive maintenance costs far less than emergency repairs, and you’ll avoid the inconvenience of a broken door when you’re rushing to work. Understanding why regular garage door maintenance is essential helps homeowners prioritize this important task. If your door is more than ten years old or sees heavy daily use, consider semi-annual professional inspections to catch wear before it becomes critical.
Putting Your Maintenance Plan Into Action
Creating a garage door maintenance routine doesn’t require hours of work or specialized expertise. Start with the simplest tasks first. Set a monthly reminder on your phone to complete your visual inspection and safety feature tests. These quick checks take less than 15 minutes but catch most problems early.
Build your seasonal schedule around the changing weather. Lubricate moving parts in spring and fall when temperature shifts put extra stress on components. Check weatherstripping before winter arrives so you’re not fighting drafts during the coldest months. Clean tracks whenever you notice buildup or at least twice a year.
The key to successful maintenance is consistency rather than perfection. You don’t need to tackle everything at once. Even implementing a few of these strategies will significantly extend your door’s lifespan and reduce the likelihood of expensive emergency repairs.
Remember that some tasks absolutely require professional expertise. Never attempt to adjust or replace torsion springs yourself. These components are under extreme tension and require specialized tools and training to service safely. The same applies to cable replacement and major alignment corrections.
Combining your DIY maintenance efforts with annual professional tune-ups creates the ideal balance. You handle the routine care that keeps everything running smoothly, while trained technicians service the high-risk components that require specialized knowledge. This approach maximizes your door’s performance while minimizing both costs and safety risks.
At Super Door Garage Door Service, we understand that your garage door is a significant investment that deserves proper care. Whether you need help establishing a maintenance routine, require urgent repairs, or want to schedule your annual professional tune-up, our locally owned team is here to help. We accept urgent repairs because we know garage door problems don’t wait for convenient times. Learn more about our services and discover how we can help you keep your garage door operating safely and reliably for years to come.
Start today with a simple visual inspection. Walk around your door, listen to how it operates, and test those safety features. Small actions now prevent major headaches later. Your garage door works hard for you every single day. These seven maintenance strategies ensure it keeps working smoothly for many years ahead.
Schedule an Appointment online Today!
More Expert Garage Door Advice